Sell on Amazon: 2025 Guide for Beginners
Step 1: Research and Plan Your Amazon Business
Identify Profitable Products
Begin by using product research tools like Jungle Scout, Helium 10, or Viral Launch to analyze market demand, competition, and potential profitability. Look for products with high demand (e.g., over 300 monthly sales for top 10 sellers) and moderate competition (e.g., less than 500 reviews for top sellers). Focus on niches with average selling prices between $15-$50, as these often offer a good balance between profit margins and sales velocity. Consider seasonality and product trends using Google Trends to ensure sustained demand throughout the year. Avoid products that are trademarked by major brands or fall into restricted categories unless you have specific approvals.
Understand Amazon’s Seller Fees and Policies
Before sourcing, familiarize yourself with Amazon’s fee structure. This includes referral fees (a percentage of the selling price, typically 8-15% depending on the category), fulfillment fees (if using FBA, based on product size and weight), and monthly storage fees. Use Amazon’s FBA Revenue Calculator to estimate your net profit per unit. Review Amazon’s Restricted Products policy and Seller Code of Conduct to ensure your chosen products comply with their guidelines. Ignorance of these policies can lead to account suspension or product removal. Pay particular attention to intellectual property rights and product safety standards.
Step 2: Set Up Your Amazon Seller Account
Choose Your Selling Plan (Individual vs. Professional)
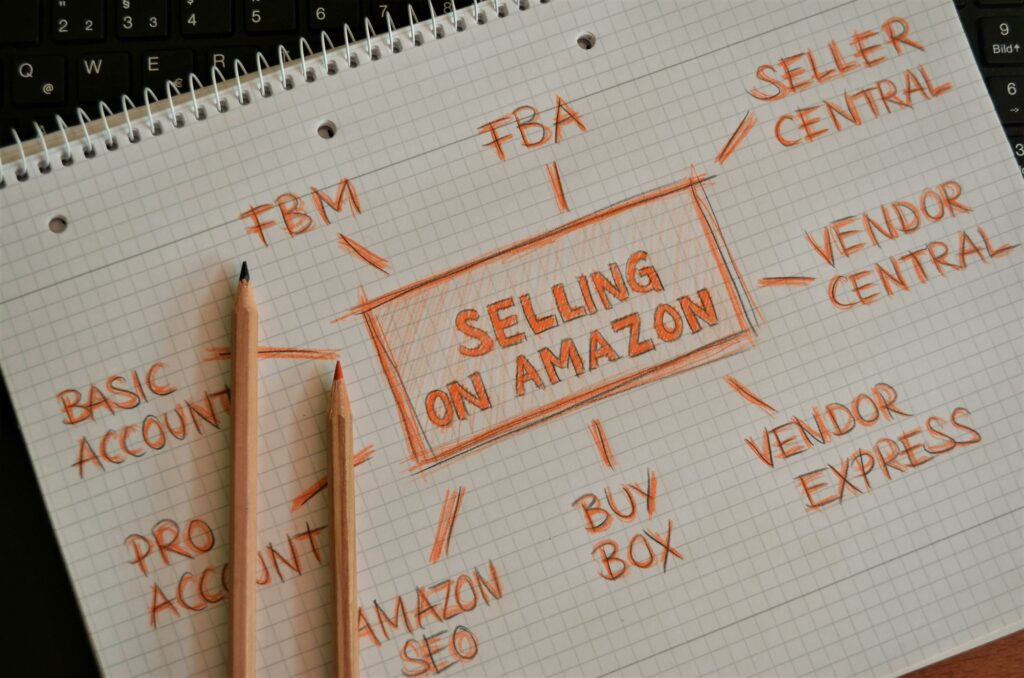
Amazon offers two main selling plans. The Individual plan charges $0.99 per item sold, suitable for sellers moving fewer than 40 units per month. The Professional plan costs $39.99 per month, regardless of the number of items sold, and unlocks advanced features like bulk listing, inventory tools, and eligibility for the Buy Box. If you plan to sell more than 40 units monthly, the Professional plan is more cost-effective. You can upgrade or downgrade your plan at any time through your Seller Central account settings.
Gather Required Documents and Information
Before registering, have the following ready: a valid credit card (not a debit card or prepaid card) for billing, a bank account for receiving payments (Amazon will verify this), a government-issued national ID (e.g., driver’s license or passport), and a recent bank account statement or utility bill (dated within the last 90 days) showing your name and address for address verification. For business accounts, you’ll also need your business name, address, and tax ID (EIN for US businesses). Ensure all information matches exactly across all documents to avoid delays in the verification process.
Step 3: Source and List Your Products
Find Reliable Suppliers
Identify suppliers through platforms like Alibaba, Global Sources, or by attending trade shows (e.g., Canton Fair, ASD Market Week). When contacting suppliers, clearly communicate your product specifications, desired quantity, and quality standards. Request samples to verify product quality before placing a large order. Negotiate minimum order quantities (MOQs) and pricing. Always perform due diligence: check supplier reviews, request business licenses, and consider using a third-party inspection service (e.g., SGS, Bureau Veritas) for quality control before shipment, especially for larger orders. Build relationships with multiple suppliers to mitigate risks.
Create Compelling Product Listings
Your product listing is crucial for sales. Start with a keyword-rich title (up to 200 characters) that includes your main product keywords. Write five concise, benefit-driven bullet points highlighting key features and uses. Craft a detailed product description (up to 2000 characters) that tells a story, addresses potential customer pain points, and reiterates benefits. Upload 7-9 high-quality images (at least 1000 pixels on the longest side for zoom functionality) including lifestyle shots, product in-use, and images highlighting features. Consider including a product video. Use Amazon’s A+ Content (for Brand Registered sellers) to enhance your listing with richer media and detailed descriptions.
Step 4: Manage Orders and Optimize for Growth
Fulfill Orders Efficiently (FBA vs. FBM)
Choose between Fulfillment by Amazon (FBA) or Fulfillment by Merchant (FBM). With FBA, you ship your products to Amazon’s fulfillment centers, and they handle storage, picking, packing, shipping, customer service, and returns. This grants your products eligibility for Prime shipping, often boosting sales. With FBM, you are responsible for all aspects of fulfillment. FBA is generally recommended for beginners due to its convenience and customer trust, though it involves higher fees. If using FBM, ensure you have reliable shipping partners and a system for timely order processing and customer communication.
Monitor Performance and Optimize Listings
Regularly review your performance metrics in Seller Central, including sales reports, customer feedback, and inventory levels. Pay close attention to your “Voice of the Customer” dashboard to identify product quality issues or common complaints. Use Amazon’s Brand Analytics (for Brand Registered sellers) to understand customer search terms and competitor performance. Continuously optimize your listings by A/B testing different titles, images, and bullet points. Run Amazon PPC (Pay-Per-Click) campaigns to increase product visibility, starting with automatic campaigns and gradually moving to manual campaigns targeting high-converting keywords. Adjust pricing based on competitor activity and market demand to remain competitive.
FAQs
Q1: How much money do I need to start selling on Amazon?
A1: The initial investment can vary significantly. For a basic start, you might need $500-$1,000 for product sourcing (e.g., 50-100 units at $5-$10/unit), plus the $39.99 monthly Professional Seller plan fee, potential FBA shipping costs to Amazon, and a small budget for initial advertising. This estimate doesn’t include product research tools, which often have monthly subscriptions. It’s advisable to have a buffer for unexpected costs.
Q2: How long does it take to get approved to sell on Amazon?
A2: Account approval can range from a few days to several weeks. The primary factor is the accuracy and consistency of the documents you provide for identity and address verification. Any discrepancies can lead to delays. Once submitted, Amazon’s team manually reviews the information. Be prepared for potential requests for additional documentation or video calls for verification.
Q3: Can I sell used products on Amazon?
A3: Yes, you can sell used products on Amazon, but it depends on the product category and condition. Some categories (e.g., clothing, shoes) generally don’t allow used items, while others (e.g., books, electronics) do. Amazon has strict guidelines for condition grading (e.g., “Used – Like New,” “Used – Very Good”). Always accurately describe the condition of your used items, as misrepresentation can lead to negative feedback and account issues.
Q4: What is the Buy Box, and why is it important?
A4: The Buy Box is the “Add to Cart” button on a product detail page. When multiple sellers offer the same product, only one seller “wins” the Buy Box, meaning their offer is presented to customers by default. The vast majority of sales on Amazon go through the Buy Box. Winning it is crucial for sales volume. Key factors influencing Buy Box eligibility include FBA status, competitive pricing, good seller performance metrics (e.g., low order defect rate, fast shipping), and sufficient inventory levels.


