Selling on Amazon for Dummies: A Beginner’s Guide
Step 1: Understand the Amazon Selling Landscape
Research Amazon Seller Account Types
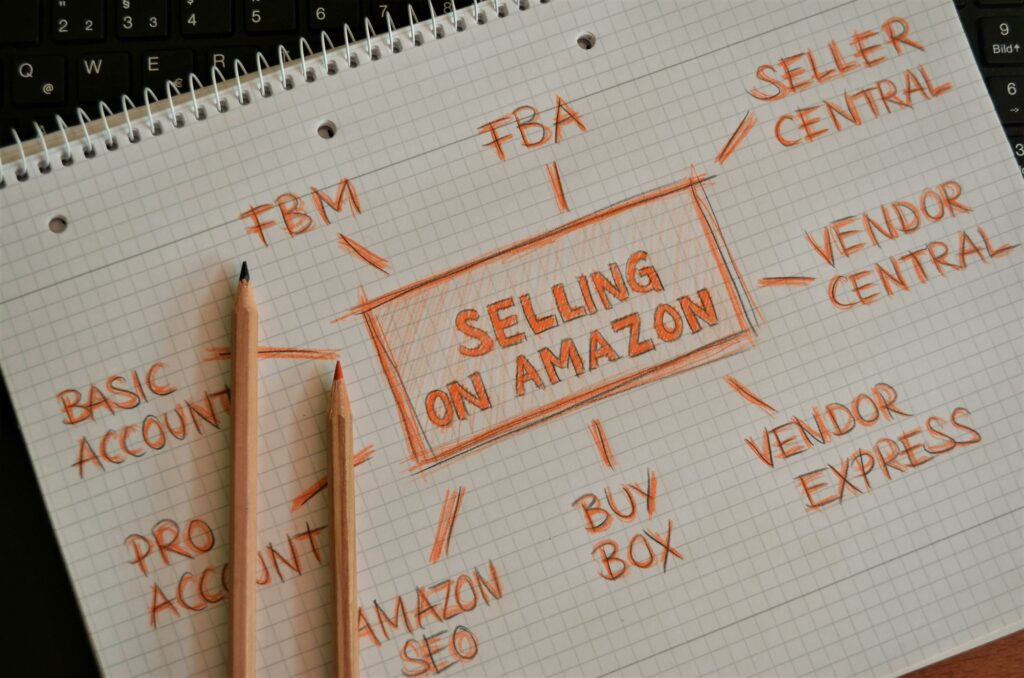
Before you even think about listing a product, it’s crucial to understand the two main Amazon seller account types: Individual and Professional. An Individual Seller account is best for those selling fewer than 40 units per month. There’s no monthly subscription fee, but you pay a $0.99 per-item selling fee in addition to other category-specific fees. This is ideal for testing the waters or selling off a few personal items. A Professional Seller account is designed for businesses or individuals planning to sell more than 40 units monthly. It has a monthly subscription fee of $39.99, but it waives the $0.99 per-item fee. Professional accounts also gain access to advanced selling tools like bulk listing, reporting, advertising options, and eligibility for the Buy Box (which is critical for sales volume).
Familiarize Yourself with Amazon’s Fee Structure
Amazon’s fees can be complex, so take the time to understand them. Beyond the per-item or subscription fees, you’ll encounter referral fees, which are a percentage of the product’s total selling price (including shipping and gift-wrap charges) and vary by product category (typically 8% to 15%). There are also variable closing fees for media categories (books, DVDs, music, video games). If you opt for Fulfillment by Amazon (FBA), you’ll incur FBA fulfillment fees (packaging, shipping, customer service) and monthly storage fees. Use Amazon’s FBA Revenue Calculator (search for “Amazon FBA calculator”) to estimate these costs for specific products before you commit to sourcing.
Step 2: Set Up Your Amazon Seller Account
Choose Your Seller Account Type (Individual vs. Professional)
Based on your research in Step 1, make a definitive decision. If you’re starting with a handful of items or just experimenting, the Individual account is cost-effective. You can always upgrade to Professional later as your sales grow. If you’re serious about building a business from day one and plan to sell more than 40 units monthly, start with the Professional account to leverage its tools and avoid the per-item fees. Go to sell.amazon.com and click “Sign up.”
Gather Necessary Documentation for Registration
Amazon has strict verification processes. Before you begin the online registration, ensure you have the following readily available: a valid credit card (not a debit card or prepaid card, as Amazon needs to verify a billing address), a bank account number and routing number for Amazon to deposit your earnings, a government-issued national ID (e.g., driver’s license or passport) for identity verification, tax information (U.S. taxpayers will need their Social Security Number or Employer Identification Number), and a phone number where you can be reached for verification. Ensure all names and addresses on your documents match precisely to avoid delays.
Step 3: Source and List Your First Products
Identify Profitable Products to Sell
This is arguably the most critical step. Don’t just sell what you like; sell what sells. Look for products with high demand and low competition. Use product research tools like Keepa, Jungle Scout, or Helium 10 to analyze sales history, BSR (Best Seller Rank), pricing trends, and competitor activity. Look for products that are lightweight and small (to minimize FBA fees), have a consistent sales history, offer a profit margin of at least 20-30% after all Amazon fees, and ideally, have a BSR under 50,000 in their main category. Consider sourcing from local wholesalers, online liquidators, or even retail arbitrage (buying from retail stores to resell online) for your initial inventory.
Create Your First Product Listing
Once you have a product, log into Seller Central and navigate to “Inventory” > “Add a Product.” You’ll either search for an existing listing (if you’re reselling an established brand) or create a brand new one. For new listings, you’ll need: a compelling product title (including brand, model, key features), at least 5 high-quality images (white background, minimum 1000px on the longest side for zoom), 5 bullet points highlighting benefits and features, a detailed product description, and relevant search terms (keywords). Pay close attention to the product category and browse nodes to ensure discoverability. Set your price strategically, considering competitor pricing and your desired profit margin.
Step 4: Manage Orders and Optimize for Success
Fulfill Your First Orders
If you chose Fulfillment by Merchant (FBM), you are responsible for packaging and shipping items directly to customers. When an order comes in, you’ll receive a notification. Log into Seller Central, print the packing slip and shipping label, package the item securely, and ship it within your specified handling time. Provide tracking information promptly. If you opted for Fulfillment by Amazon (FBA), Amazon handles everything after you send your inventory to their warehouses. You’ll simply monitor your FBA inventory levels and replenishment needs.
Monitor Performance and Optimize Your Listings
Regularly check your Seller Central dashboard. Pay close attention to your “Performance” metrics, especially your Order Defect Rate (ODR), Late Shipment Rate, and Pre-fulfillment Cancel Rate. High rates in these areas can lead to account suspension. Analyze your sales reports to see what’s selling and what isn’t. Use A/B testing on your product titles, images, and bullet points to see what converts best. Respond to customer questions and reviews promptly and professionally. Actively solicit positive reviews (within Amazon’s terms of service) to build trust and improve your product’s visibility.
FAQs
Q: How long does it take to start selling on Amazon?
A: Setting up your seller account can take anywhere from a few hours to a few days, depending on how quickly Amazon verifies your documentation. Once verified, you can list products almost immediately. The time it takes to make your first sale depends on your product, pricing, and listing optimization, but many sellers see sales within a few days or weeks of going live.
Q: Do I need a business license to sell on Amazon?
A: For most individual sellers, a specific business license isn’t required by Amazon. However, you are operating a business, and it’s your responsibility to comply with all local, state, and federal laws, which may include obtaining a business license or sales tax permit depending on your location and business structure. It’s always best to consult with a legal or tax professional.
Q: What is the Buy Box, and why is it important?
A: The Buy Box is the “Add to Cart” button on a product detail page. When multiple sellers offer the same product, only one seller “wins” the Buy Box at any given time, meaning their offer is presented to the customer by default. Winning the Buy Box is crucial because the vast majority of sales occur through it. Factors influencing Buy Box eligibility include pricing, FBA status, shipping speed, and seller performance metrics.
Q: Can I sell used products on Amazon?
A: Yes, you can sell used products on Amazon, but it depends on the product category and specific condition guidelines. Some categories like clothing or beauty products typically only allow new items. For categories like books, electronics, or video games, used conditions are common. Always check Amazon’s condition guidelines for the specific product and category before listing a used item to ensure compliance.


