Step 1: Understand the Requirements and Choose Your Selling Plan
Assess Your Business Needs and Goals
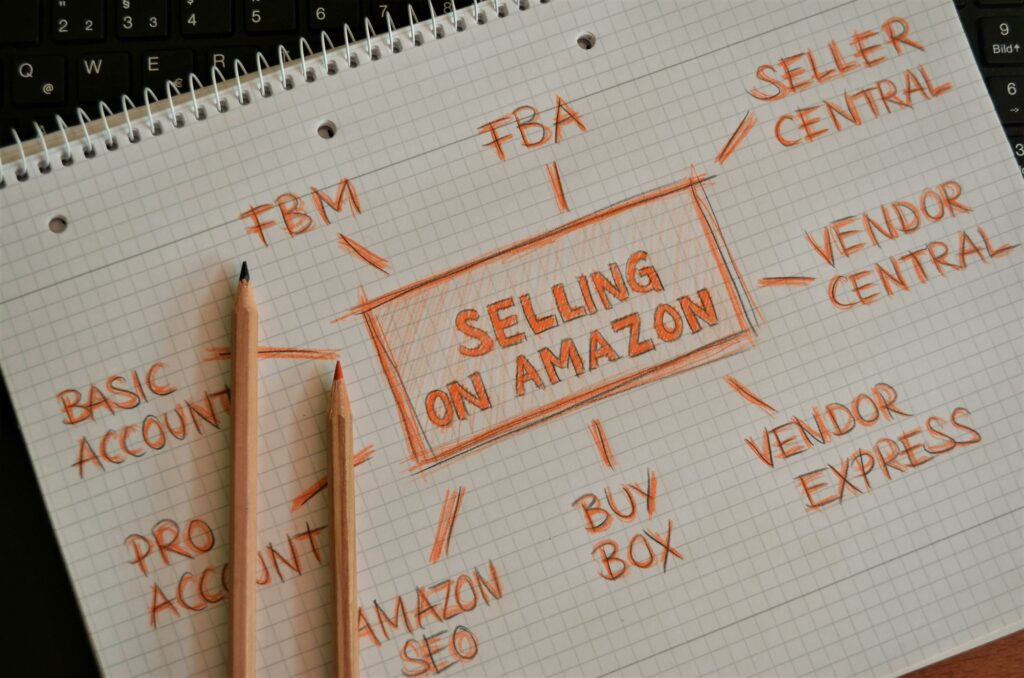
Before you begin the registration process, it’s crucial to define your selling strategy. Consider what types of products you plan to sell, your anticipated sales volume, and your comfort level with inventory management and fulfillment. If you expect to sell more than 40 items per month, or if you require advanced selling tools like APIs, reporting, and customization, the Professional selling plan is likely more cost-effective. If you anticipate selling fewer than 40 items per month and prefer a simpler approach without monthly fees, the Individual plan might be suitable. The Individual plan charges a per-item fee of $0.99 for each sale, while the Professional plan has a flat monthly subscription fee of $39.99 (as of the last update). Clearly understanding your business model will help you select the most appropriate plan and avoid unnecessary costs.
Review Amazon’s Seller Requirements and Fees
Amazon has specific requirements and fees beyond the monthly/per-item charges. You’ll need a valid credit card, a bank account for deposits, and a phone number. Be aware of various selling fees, including referral fees (a percentage of the product’s selling price, varying by category), closing fees (for media items), and fulfillment fees if you opt for Fulfillment by Amazon (FBA). Research the referral fees for your specific product categories on Amazon Seller Central’s fee schedule to accurately project your profitability. Also, understand that Amazon may require additional verification steps, such as video calls, to confirm your identity and business legitimacy.
Step 2: Gather Necessary Information and Documents
Prepare Your Business and Personal Identification Details
To ensure a smooth registration process, have all required identification documents readily accessible. For personal identification, you’ll need a government-issued ID (e.g., passport or driver’s license). For business identification, depending on your business structure, this could include your business registration documents, Articles of Incorporation, or a business license. Ensure that the names and addresses on all documents precisely match the information you will provide to Amazon. Any discrepancies can lead to delays or rejection of your application. If you are registering as a company, be prepared to provide details for all beneficial owners and key personnel.
Collect Financial and Tax Information
You will need a valid, internationally chargeable credit card with a valid billing address. This card is used for Amazon to charge your monthly subscription fee (if on the Professional plan) and any other selling fees. Additionally, you’ll need a bank account for Amazon to deposit your earnings. Ensure the bank account is in the name of the registered seller (individual or business). For tax purposes, you will need your Tax Identification Number (TIN) or Employer Identification Number (EIN) if you are in the U.S. Non-U.S. sellers will provide their relevant tax identification details as required by their country of origin and Amazon’s tax regulations. Have your bank account number and routing number (for U.S. accounts) or equivalent international banking details ready.
Step 3: Register Your Amazon Seller Account
Navigate to the Amazon Seller Central Registration Page
Open your web browser and go directly to the Amazon Seller Central website (sellercentral.amazon.com). Look for the “Sign Up” or “Register now” button. Avoid searching for “Amazon seller” on general search engines, as this might lead to third-party sites or outdated information. Ensure you are on the official Amazon domain to protect your personal and financial information. The registration page typically provides an overview of the two selling plans and their respective benefits.
Follow the On-Screen Prompts to Complete Registration
The registration process is guided by a series of on-screen prompts. You will be asked to provide your email address and create a password. Then, you’ll select your business location and type (e.g., individual, privately-owned business, publicly-owned business, charity). Subsequently, you’ll input your personal information (name, date of birth, country of citizenship), business details (legal business name, address), and banking information. You will also be prompted to provide your credit card details for billing and your tax identification information. Carefully review each screen before proceeding to the next. Amazon may initiate a phone call or SMS verification to the number you provide as part of the process. Be prepared for potential video verification calls, which are becoming more common for identity confirmation.
Step 4: Configure Your Seller Account and List Your First Product
Set Up Your Payment and Deposit Methods
Once your account is registered and approved, log into Seller Central. Navigate to the “Settings” menu (usually a gear icon) and select “Account Info.” Here, you’ll find sections for “Payment Information.” Under “Deposit Method,” enter your bank account details where Amazon will disburse your sales proceeds. Under “Charge Method,” ensure your credit card information is correct and up-to-date for Amazon to charge your fees. Regularly verify these details to prevent payment disruptions or delays in receiving your funds. Amazon typically holds funds for a period before disbursement, so don’t expect immediate payouts.
Begin Listing Your Products for Sale
From the Seller Central dashboard, go to the “Inventory” tab and select “Add a Product.” You have two main options: “Search for your product in Amazon’s catalog” if you’re selling an existing product, or “I’m adding a product not sold on Amazon” if you’re creating a new listing. If your product already exists, simply search by ASIN, UPC, EAN, or ISBN and click “Sell Yours.” If it’s a new product, you’ll select the appropriate product category and then fill in all required details, including product ID (UPC/EAN/ISBN), title, brand, manufacturer, description, bullet points, images, price, quantity, and fulfillment method (FBA or FBM). High-quality images and compelling product descriptions are crucial for attracting buyers. Ensure all mandatory fields are completed accurately to make your listing live.
FAQs
Q1: How long does it take for Amazon to approve a new seller account?
A1: The approval time can vary significantly. Some accounts are approved within a few hours, while others might take several days or even weeks, especially if additional verification steps like video calls or document submissions are required. Ensure all information provided is accurate and consistent across documents to expedite the process.
Q2: Can I change my selling plan (Individual to Professional or vice versa) after registration?
A2: Yes, you can easily change your selling plan at any time. Log into your Seller Central account, go to “Settings” > “Account Info” > “Your Services” > “Manage.” From there, you can switch between the Individual and Professional selling plans. Be aware that switching to Professional will incur the monthly fee immediately, and switching to Individual will stop the monthly charge but apply the per-item fee.
Q3: What if I don’t have a UPC/EAN for my product?
A3: If your product doesn’t have a standard UPC, EAN, or ISBN, you have a few options. You can purchase legitimate UPCs from GS1, the global standard organization. Alternatively, if you are the brand owner and have a registered trademark, you can apply for Amazon’s Brand Registry, which allows you to list products without standard product IDs by using a Global Trade Item Number (GTIN) exemption.
Q4: Do I need a business license to sell on Amazon?
A4: While Amazon itself doesn’t always strictly require you to upload a business license during initial registration (especially for Individual sellers), it is highly recommended and often legally necessary depending on your location and the scale of your business. Amazon may request it during verification, and your local government likely requires it for commercial activities. Operating without proper business registration can lead to legal issues. Always check your local and state/provincial regulations.


